My boyfriend, sister and I recently moved into a new apartment. Upon first sight, we fell in love with everything from the long, brick hallway to the over-sized kitchen (over-sized for NYC) and larger bedrooms than our previous pad. The not-so-good part of the apartment however, were the newly painted bright baby blue walls (yes baby blue can be bright!) that covered both me and my sister's bedroom walls and ceilings. Yikes! So prior to moving in, I went on an expedition to Home Depot, picked out 2 cans of Behr white paint, rollers and brushes - and got to work.
Once my bedroom was "back to norm," I was now faced with the reality that it was just so plain and basic. Besides the obvious additions (modern ceiling pendant lamp, metallic mirror and clear nightstand), I needed something more. I went straight to the internet and automatically thought of doing a gold accent wall since the colors in my room were to be white, gold and silver. But once I found the design I liked, which I found out was gold leaf, I also found out that it was nearly impossible to find and pretty difficult to do.
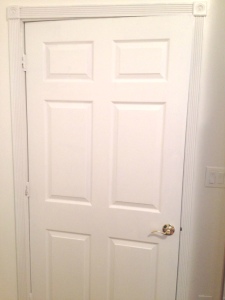
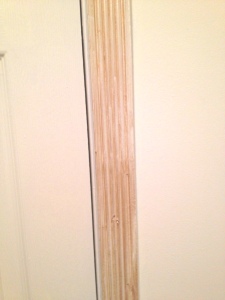
The apartment definitely has old-school charm and the accents are very traditional. So the door trimmings in my bedroom are very articulate and unique, which sparked my creative interest. Looking around at my two closet doors, bathroom door and bedroom door, I decided what my DIY would be: painting the outer trimmings of the doors metallic gold to add shine, life, and that cozy, rustic feel.
See below to see how it's done!
Supplies:
- Paint brush (I used an old brush that the bristles were hard so when used, the paint strokes were more defined)
- Martha Stewart metallic paint (specialty finish) in vintage gold satin
- Tape
- Stool (something to stand on!)
Directions:
- First tape the edges where the doors meet the wall - basically wherever you don't want paint, tape!
- Open paint jar and stir - fyi this paint smells pretty bad so maybe open window!
- Dip brush in paint - you only want to dip the brush in a little, especially if you want the vintage rustic look.
- Start painting! I did upward and downward strokes on the panels of the doors and at the top of doors, brushed side to side. I did pretty evenly because I wasn't going for the look where you see the actual strokes of the brush, although that looks nice too!
- Once your done painting, let dry. This paint dries pretty quickly so if you want a second coat, give it about 20 mins and paint on! Good luck! p.s. you will have plenty of paint left over - I decided to revamp my white coffee table and a wooden basket! Pics to come soon!


No comments:
Post a Comment