11.26.2012

Rover.Com - My first dog-watching!


I recently made a profile on Rover.com in hopes of someone hiring me to watch their dog while they're away. I have a dog so it made it all the more sense because Gavin would have someone to play with (other then me!).  So, along came Kobe who is a Bichon Frise and about 10 years young.  I had him for the weekend so it was only 2 nights but was a perfect amount of time for my first dog-sit.
Basically, for any of those who wonder how it is, it's great! Of course I can only speak for my experience, but I definitely recommend it for anyone who is looking to have a short-term companion and also a few extra bucks. My charge is $25/night and Rover.com is not required to dog-sit (duhhh), but I recommend it b/c it is very convenient, and you can see the dogs/owners before you confirm the stay.  Also, all payments are done through this site...and you even have the option to give a percentage of your proceeds to charity - perfect!
Any questions for me? Post in the comments and I'll be sure to write back! Here's a link to my Rover.com profile as well! http://www.rover.com/members/ashley-s-your-dog-will-have-my-dog-to-play-with/?service=home
Kobe (guest) and Gavin (mine!) lounging - soooo cute!

11.20.2012

DIY: Oxblood w/Black Stripe Nails!


I am always inspired by bloggers, and this idea is no different. One of my favorite blogs, Love Aesthetics http://love-aesthetics.blogspot.com/  by Ivania Carpio featured a single black stripe down clear-painted nails. Very chic so I decided to give my own spin on them by just adding an oxblood base color. Check out below!
How I did it:
  1. Prep nails
  2. Paint base color with oxblood/burgundy color
  3. Let dry
  4. Paint thin black stripe starting at where half-moon ends
  5. Cover with topcoat
Oxblood nails with black stripe!
Finished nails!

11.15.2012

DIY: Black and White Nails - Reverse French Manicure


I love all things nails, and being in NYC gives me the opportunity to see what's hot in the streets.  I recently was in MAC and saw their new, limited-edition falsies nail collection and instantly fell in love. Loved the matte black with shiny gold tips, the red/white/black theme and the white with black moons and tips.  What I didn't like was the price ($25).  It's not that bad, but I also hate wearing fake nails with the chance of them falling or breaking off (embarrassing!!).  So, being the nail junkie I am I decided to grab our first-aid friend, the band-aid and get to work!!

I first heard of the band-aid trick through one of my favorite blogging channels, Andrea's Choice http://www.youtube.com/watch?v=6WOBA9simFY and it was so easy, I've been doing it ever since.  You basically get perfect french or reverse french every time! Watch the DIY below to get perfect reverse french nails without having to fork out the cash for the falsies!

Supplies you will need:
  1. white nail polish
  2. black nail polish
  3. 5 band-aids (cut in half)
  4. base coat/top coat
Directions:
  1. After applying base coat/hardener, paint all of your nails black. I only needed to use one coat for this and I recommend the same for you.
  2. Once the black is *completely* dry, grab the band-aids (at this point they should be cut in half) and using the round side of each band-aid piece, apply to the half-moon of your nail. Make sure to stick band-aid to your hand (3-4 times) first to get some of the stickiness off so the band-aid doesn't pull off the polish.
  3. Once you have all of the band-aids stuck in the right place on your nails, paint the top portion above the band-aid white.  I used two coats for this color since I think white chips more easily.
  4. Let dry.
  5. Once they are dry, peel the band-aids off (go slow).
  6. Tada!! Now you have beautiful reverse french nails!! Just remember to apply top coat.
Black and white reverse-french mani!
Finished!!

11.14.2012

DIY: Adding Leather Cuffs to Your Jacket!


So I recently bought this great, light-weight jacket from H&M (1/2 off + 30%off!!!), so definitely a steal!  Once I tried on the jacket, it was the perfect fit but as usual, being 5'9" my arms are *very* long (am I the only one??), and the sleeves of the jacket were about 2 inches too short.  I instantly thought DIY and quickly sewed some great faux leather cuffs on to elongate the sleeves and now they are perfect!  See below on how to to this easy DIY!

Supplies Needed:
  1. sewing machine/needle and thread
  2. fabric (faux leather, suede, fur)
  3. jacket
  4. measuring tape
  5. pins
Before...
1. Measure your leather/fabric (whatever you're using) to the armholes in the jacket leaving about 1 inch to work with
2. Turn jacket inside out. You can see I had already finished one cuff
3. Attach the leather to the bottom of the jacket sleeve by using pins. Make sure it is straight!
4. Pin all the way around. As you can see, once I got to the seam, I stopped and after sewing the cuff to the sleeve, you can then sew the side seam.
5. Start sewing! Sew all the way around the cuff either by hand or machine. Don't forget to backstitch!
6. I used thread that matched the jacket but you can always use another color to add contrast!
7. I used an angle cut to give it a more modern look instead of the plain straight edge. Give it a try!
Finished jacket!! Don't mind my hair....and yes, the belt came with it!!

11.03.2012

DIY: How to use Metallic Paint on Bedroom Walls and Trims!


My boyfriend, sister and I recently moved into a new apartment.  Upon first sight, we fell in love with everything from the long, brick hallway to the over-sized kitchen (over-sized for NYC) and larger bedrooms than our previous pad.  The not-so-good part of the apartment however, were the newly painted bright baby blue walls (yes baby blue can be bright!) that covered both me and my sister's bedroom walls and ceilings.  Yikes!  So prior to moving in, I went on an expedition to Home Depot, picked out 2 cans of Behr white paint, rollers and brushes - and got to work.

Once my bedroom was "back to norm," I was now faced with the reality that it was just so plain and basic.  Besides the obvious additions (modern ceiling pendant lamp, metallic mirror and clear nightstand), I needed something more.  I went straight to the internet and automatically thought of doing a gold accent wall since the colors in my room were to be white, gold and silver.  But once I found the design I liked, which I found out was gold leaf, I also found out that it was nearly impossible to find and pretty difficult to do.

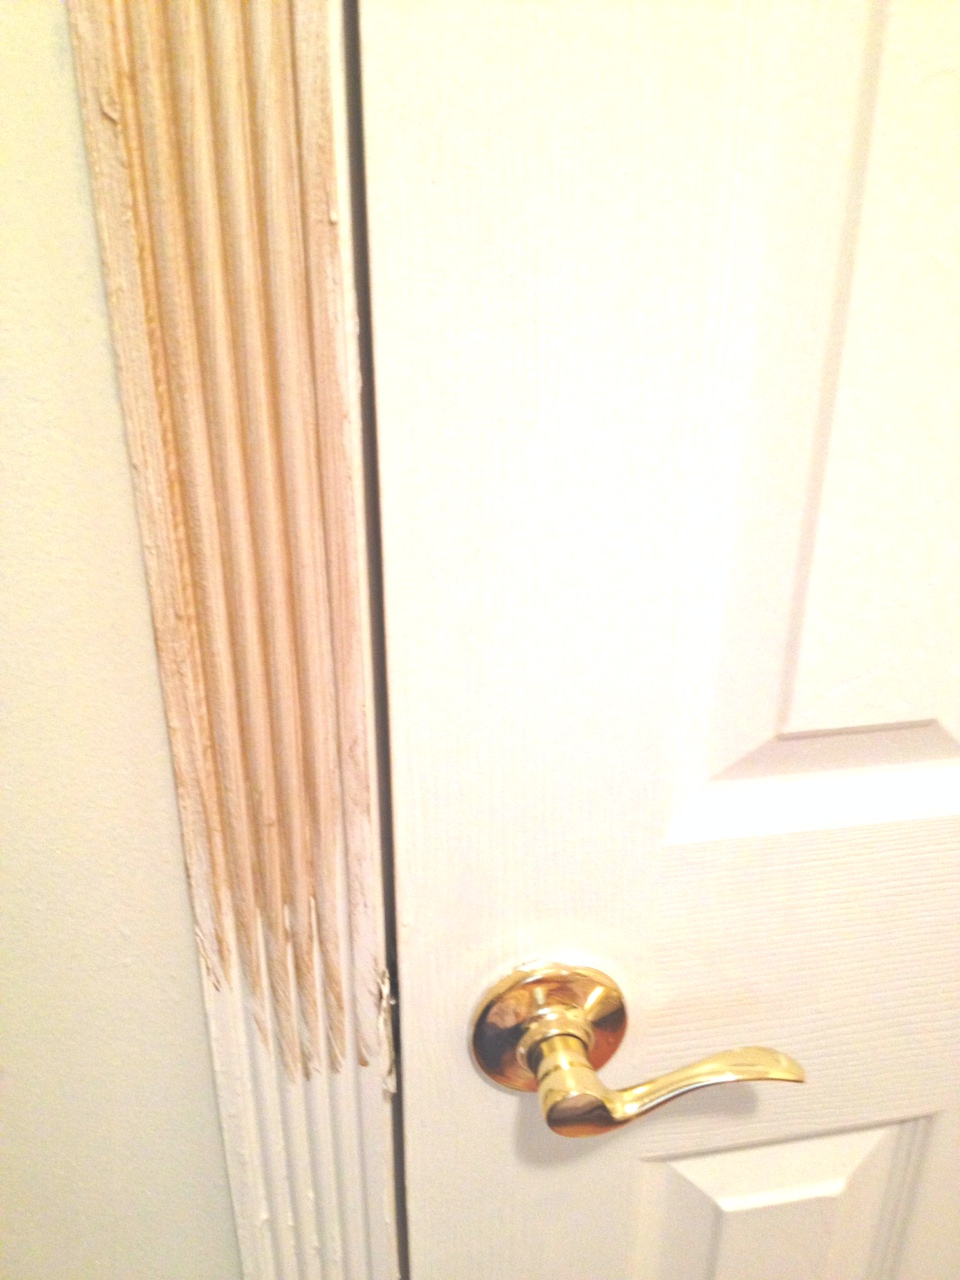
The apartment definitely has old-school charm and the accents are very traditional. So the door trimmings in my bedroom are very articulate and unique, which sparked my creative interest.  Looking around at my two closet doors, bathroom door and bedroom door, I decided what my DIY would be: painting the outer trimmings of the doors metallic gold to add shine, life, and that cozy, rustic feel.
See below to see how it's done!

Supplies:
  • Paint brush (I used an old brush that the bristles were hard so when used, the paint strokes were more defined)
  • Martha Stewart metallic paint (specialty finish) in vintage gold satin
  • Tape
  • Stool (something to stand on!)


Directions:
  1. First tape the edges where the doors meet the wall - basically wherever you don't want paint, tape!
  2. Open paint jar and stir - fyi this paint smells pretty bad so maybe open window!
  3. Dip brush in paint - you only want to dip the brush in a little, especially if you want the vintage rustic look.
  4. Start painting! I did upward and downward strokes on the panels of the doors and at the top of doors, brushed side to side.  I did pretty evenly because I wasn't going for the look where you see the actual strokes of the brush, although that looks nice too!
  5. Once your done painting, let dry. This paint dries pretty quickly so if you want a second coat, give it about 20 mins and paint on! Good luck! p.s. you will have plenty of paint left over - I decided to revamp my white coffee table and a wooden basket! Pics to come soon!
Before
Martha Stewart Metallic Paint
Brush and top of door trim
Side of door trim - during painting process
Finished door trim - One Coat only!
Finished bedroom, storage and closet door!
Finished bedroom with gold metallic paint!

10.01.2012

Soda to be Banned?? | Why it’s Not the End of the World


Nothing will get people talking and riled up more than a proposed ban on soda in NYC.  Mayor Bloomberg (Independent) announced this week that he is proposing to ban the drinking of soda, sizes 16oz. and more.
New York City is known for its hip and trendy nightlife and for the people who don’t take nothing from nobody.  So obviously when news surfaced about Bloomberg’s plan, fury enraged the people of the city, and continues to boil.  However, not everyone is ready to fight back against this ban.  Several commentators and locals have praised Bloomberg for his soda-ban initiative and see this as a good and much needed change.
Myself, being a two-year-and-some-change New Yorker, have flourished in this city as a Liberal who is willing to always look at both sides of an issue.  However, once I saw the beginning stages of news coverage for this ban, I did not feel upset, but relieved; finally, some help.  I am a full believer in the First Amendment, (which those who oppose this ban are retaliating with), but the First Amendment does not protect against government bans on soda, cigarettes, use of seat belts, etc.  It merely allows freedom of speech, freedom of religion, freedom of the press and the right to assemble and petition the government.  I love all of these freedoms and am blessed to be in a country that protects them, but there comes a point when we as a people need to work together to solve our issues on health, without hiding behind the First Amendment.
I understand the argument that people will just buy two 16oz. sodas instead of one 32 oz. soda to fulfill their desires, but I disagree with that argument.  If the price of soda rises (such as did cigarettes), and the quantity in each soda decreases (no more than 16oz.), then less people will be willing to buy the sugary drink in large quantities.  The majority of the time, one can buy a two-liter bottle of soda for the same price as a 20oz. bottle of soda, therefore, they opt for the larger container.  This rationing practice reminds me of the blindfold diet, in which study results showed that when participants were blindfolded while eating, they ate significantly less food then when they were not blindfolded.  Conclusion: when blindfolded, people do not use their eyes but their stomachs to determine their full.  Same goes in the case of soda intake: if a person only has a small 12oz or 16oz soda, that is all they will drink.  In time, their urge and dependency on soda will decrease, thus reducing their sugary substance intake altogether, and with diet and exercise, elongating their life and health.
With over one-third of U.S. adults suffering from obesity and 48.2 million people are smokers, something needs to be done in order to keep Americans and those all around the world, healthy.  No one likes to have their rights banned or rationed or rules to be in place after a long time of doing it their way, but we have to remember that change and laws are what we sometimes need in this society.  There were protests and riots when the seatbelt law came about and when smoking was banned in restaurants and establishments.  This is just another law we need to help and protect us.

8.13.2012

“Suicide while handcuffed in a Police Car”…Possible? I think Not | The story of Chavis Carter


It has been almost a month since I have published a post, due to summer happenings – running around, watching Olympics, vacationing, etc.  But the more time that passes between posts, the more news I’m missing and leaving behind.  In all honesty, it is hard to write this piece because of the anger that I have for something so wrong to happen to America’s youth.

Take the story of Chavis Carter, a 21-year old black man from Mississippi, who on July 29th was pulled over in his car, along with two of his friends, for “suspicious driving.”  Upon approach, the cops of the Jonesboro Police Department decided they needed backup, for reasons unknown.  They searched Carter and found a $10 bag of marijuana.  Meanwhile, they let the two friends, both white, leave the scene.  

During the search of the car, they find a scale and a bag of a white substance, later identified in a report as sugar.  The police also reported that Carter had a warrant and previously had given them a false name.
Was this enough to arrest Carter?  Sure, it was.  Marijuana is illegal, although a $10 sack would not normally put you behind bars.  But Carter did have a warrant in another state, so yes, in my opinion that was enough cause for an arrest.  Following police procedures, they searched Carter, not once, but twice and placed him in the back of a squad car, HANDCUFFED.

What happened next is a horrendous act by the Jonesboro Police Department.  The officers say once they headed back to their cars, they saw Carter slumped in the backseat with a gunshot wound to the right side of his head.  Not only do they claim that he somehow committed suicide while being placed in a small backseat of a squad car AND handcuffed, but somehow Carter had got a hold of a gun after being searched not once, but twice.

According to Carter’s mother, Chavis had called his girlfriend and told her that he had been arrested and asked her to come to the jail to bail him out.  Also, the gunshot wound was in the right side of his head, and his mother claims he was left-handed.

As the FBI investigates this crime, I cannot sit here and say that this was not racially motivated and planned.  My questions to the Jonesboro Police Department are:
  1. Where is the gun that Carter supposedly had?
  2. Why is there no dashcam surveillance from the squad car, or was that part of the plan as well?   - It is said that there is no camera surveillance because coincidentally, the two squad cars parked trunk to trunk; when does that ever happen on a traffic stop?
  3. In regards to the question of how could someone break out of handcuffs and commit suicide in the back of a squad car, Jonesboro Chief of Police, Michael Yates, said on CNN: “Well, fact of it is, it’s very possible.  It’s quite easy.”  - I would like him to elaborate on how it is so easy to break out of handcuffs while in a squad car, find a gun, and pull the trigger – all while using your non-dominant hand.
  4. How did the police officers not hear the gunshot? – The police officers at the scene, not even a car distance away, according to reports, claim they never heard a gunshot, but rather found Carter’s body slumped over later.  How is this possible when other reports say you can hear a gunshot up to five miles away, not just a few feet?
  5. As for the search and frisk that the police officers say they performed on Carter, how did they seem to find a $10 bag of marijuana but miss a deadly weapon, not after one, but two searches? – Let’s be honest, there was NO weapon.
These police officers should be arrested and charges brought against them for the crime they committed.  This case should receive the same attention as Trayvon Martin because there was no right to kill.  Having officers of the law shoot a 21-year old man and then lying and claiming it’s suicide is despicable and I hope they are punished for it, as it seems Chavis was punished for being black.